Project Auto Assignment
Automatically assign activities to projects using smart rules.
Create Auto-Assignment Rules
Pick your favorite method:
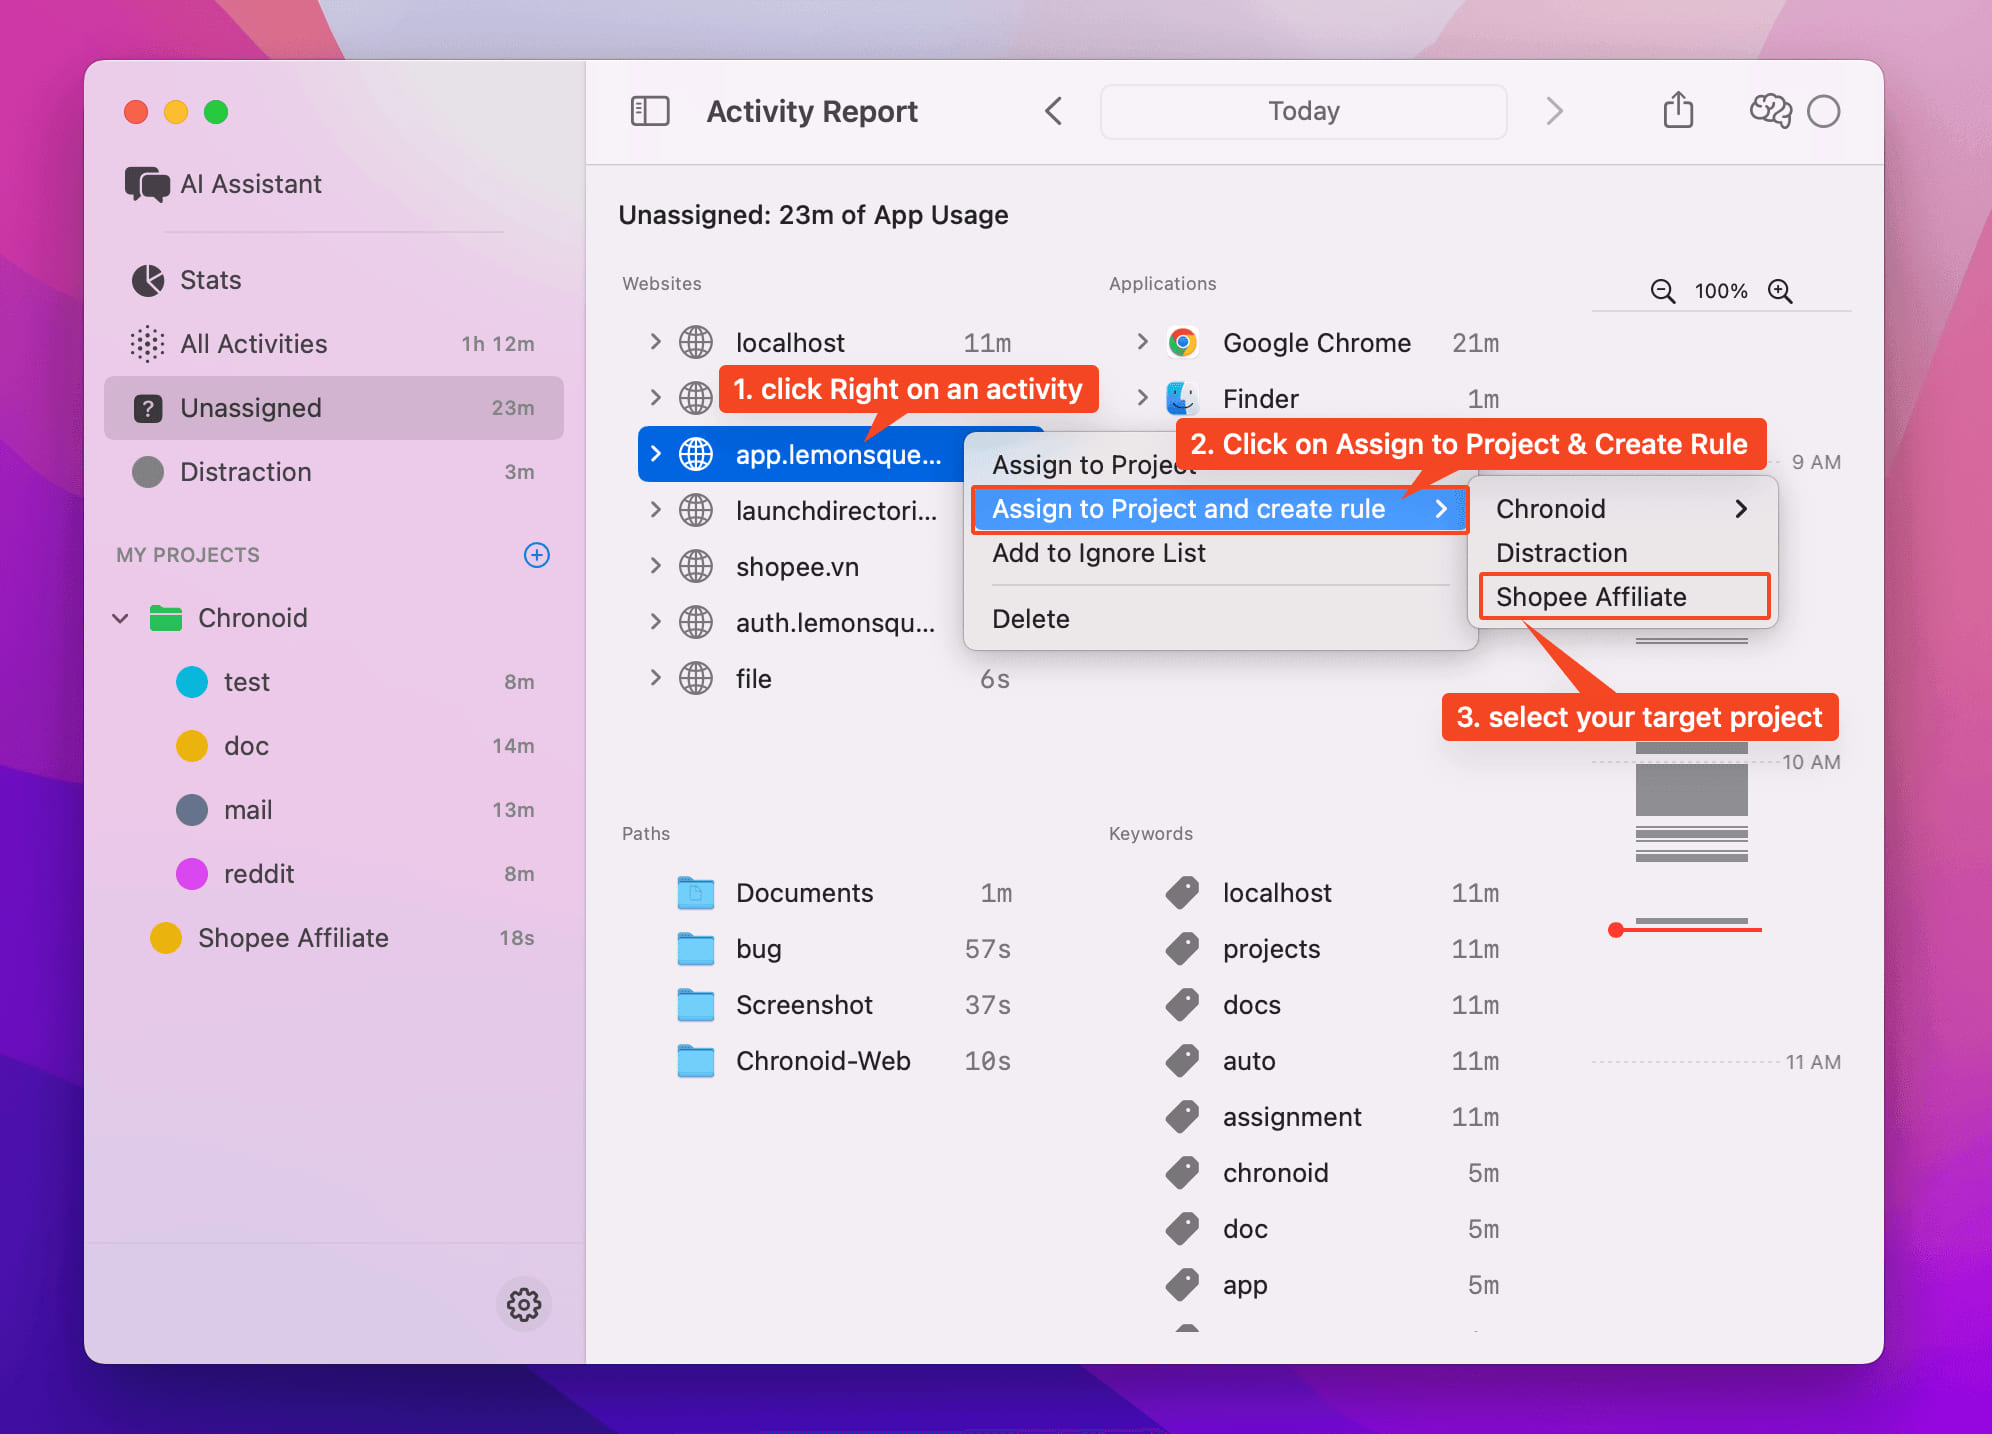
Right-click Method
- Right-click any activity
- Select Assign to Project and create rule
- Choose your project
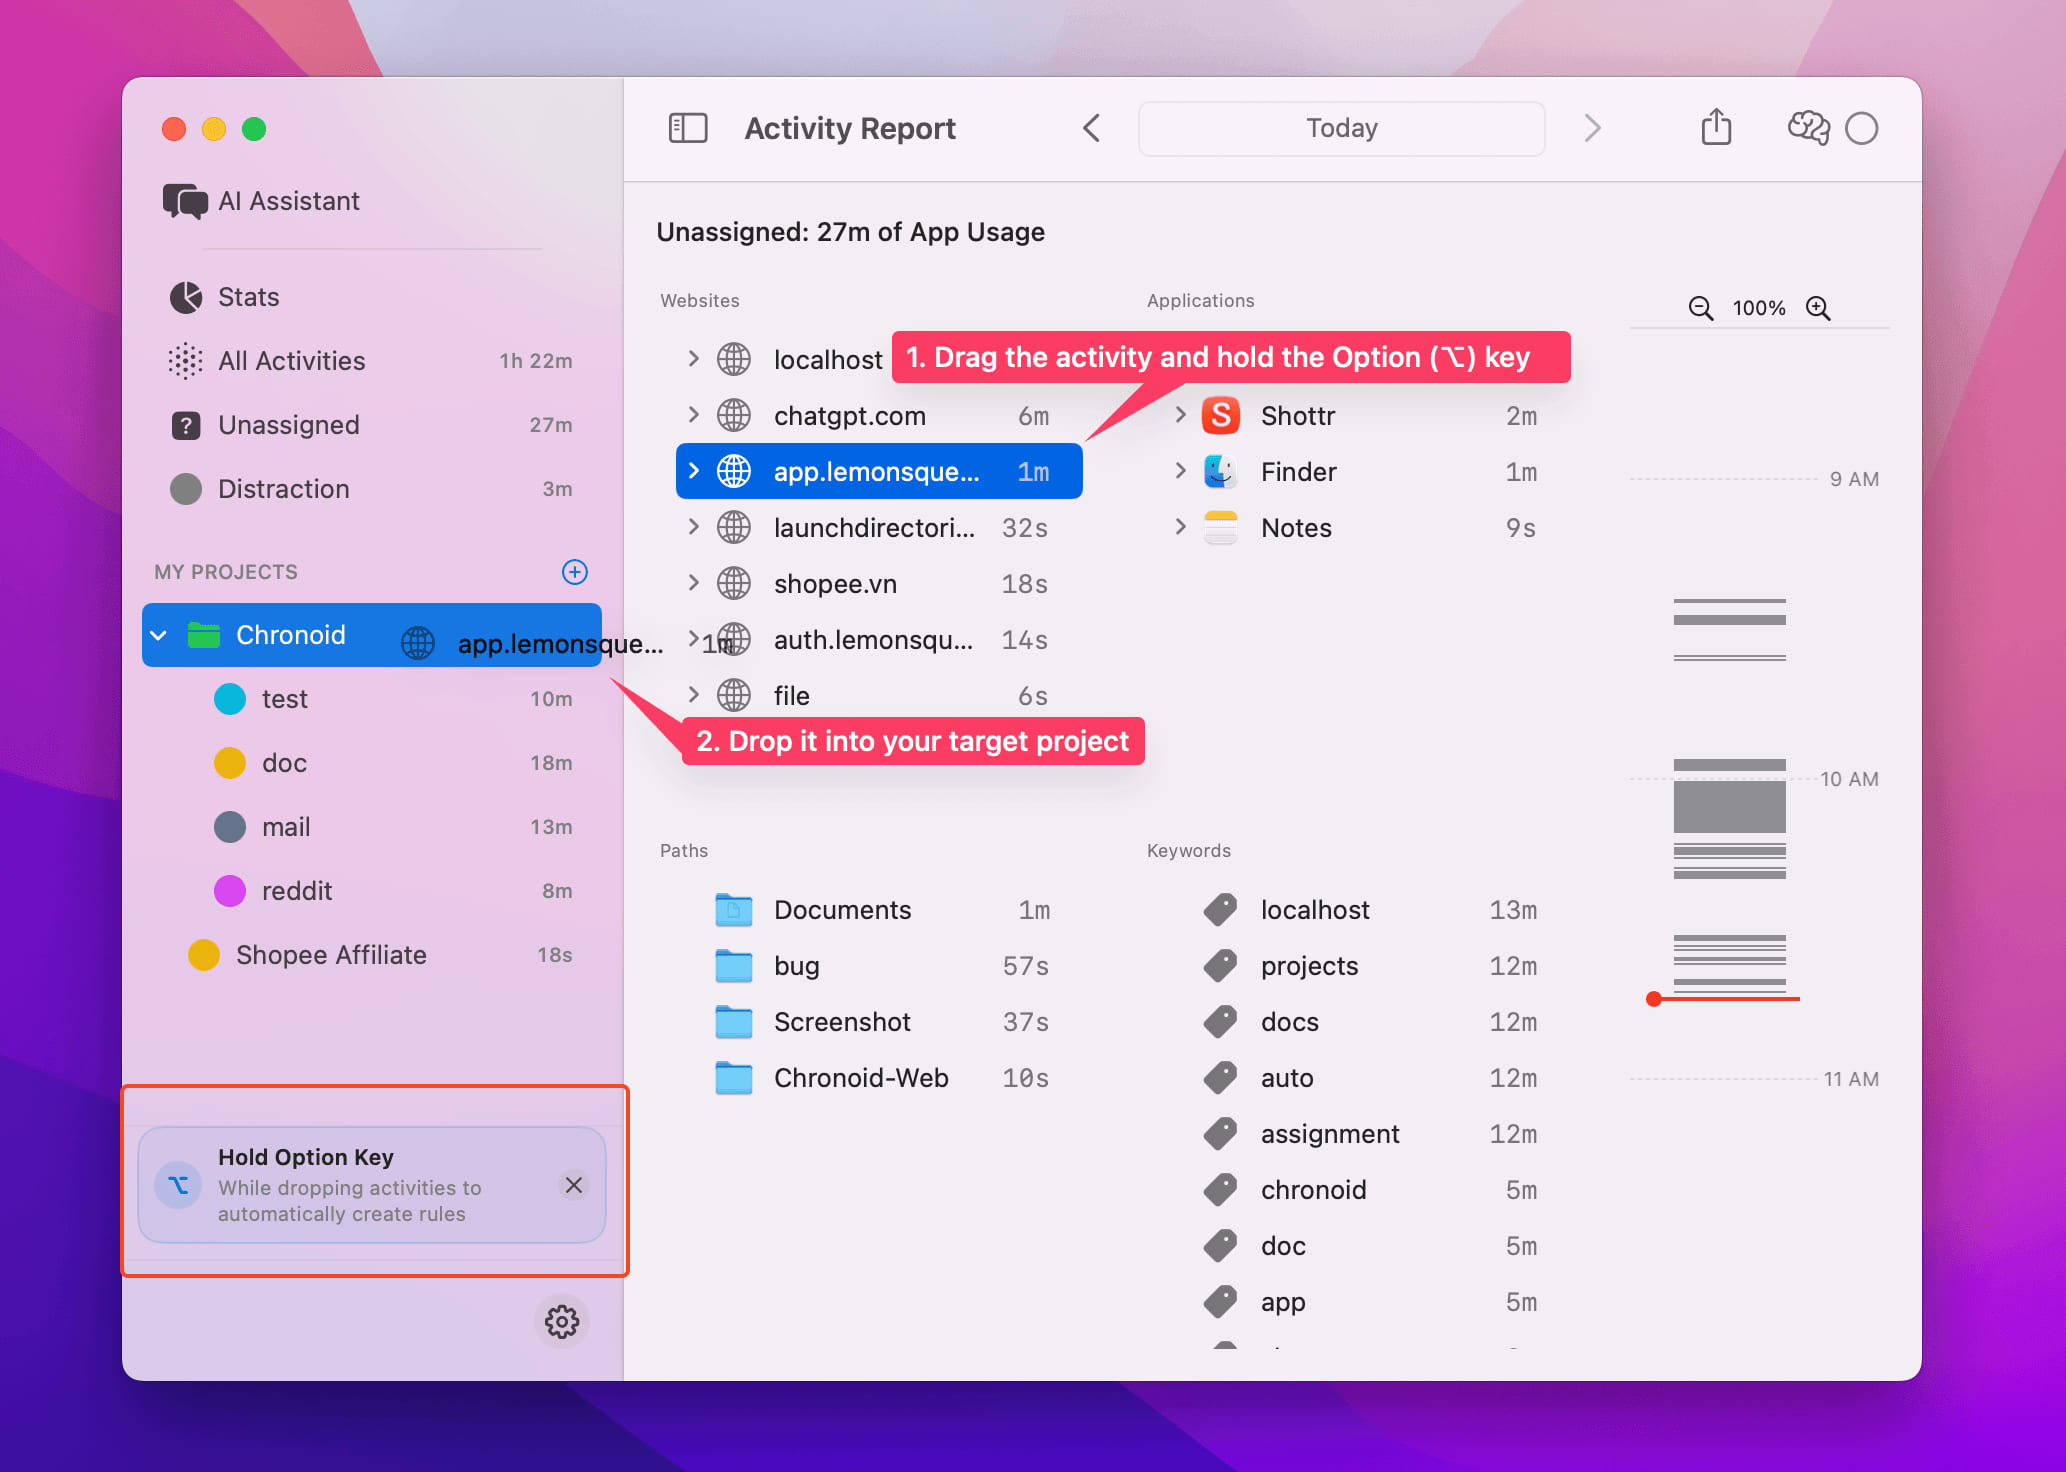
Drag + Option Method
- Drag an activity while holding Option (⌥)
- Drop it on your project in the sidebar
💡 Chronoid learns your patterns! Future activities auto-assign automatically.
Manage Your Rules
Fine-tune how activities are automatically categorized using the Rules Configurator.
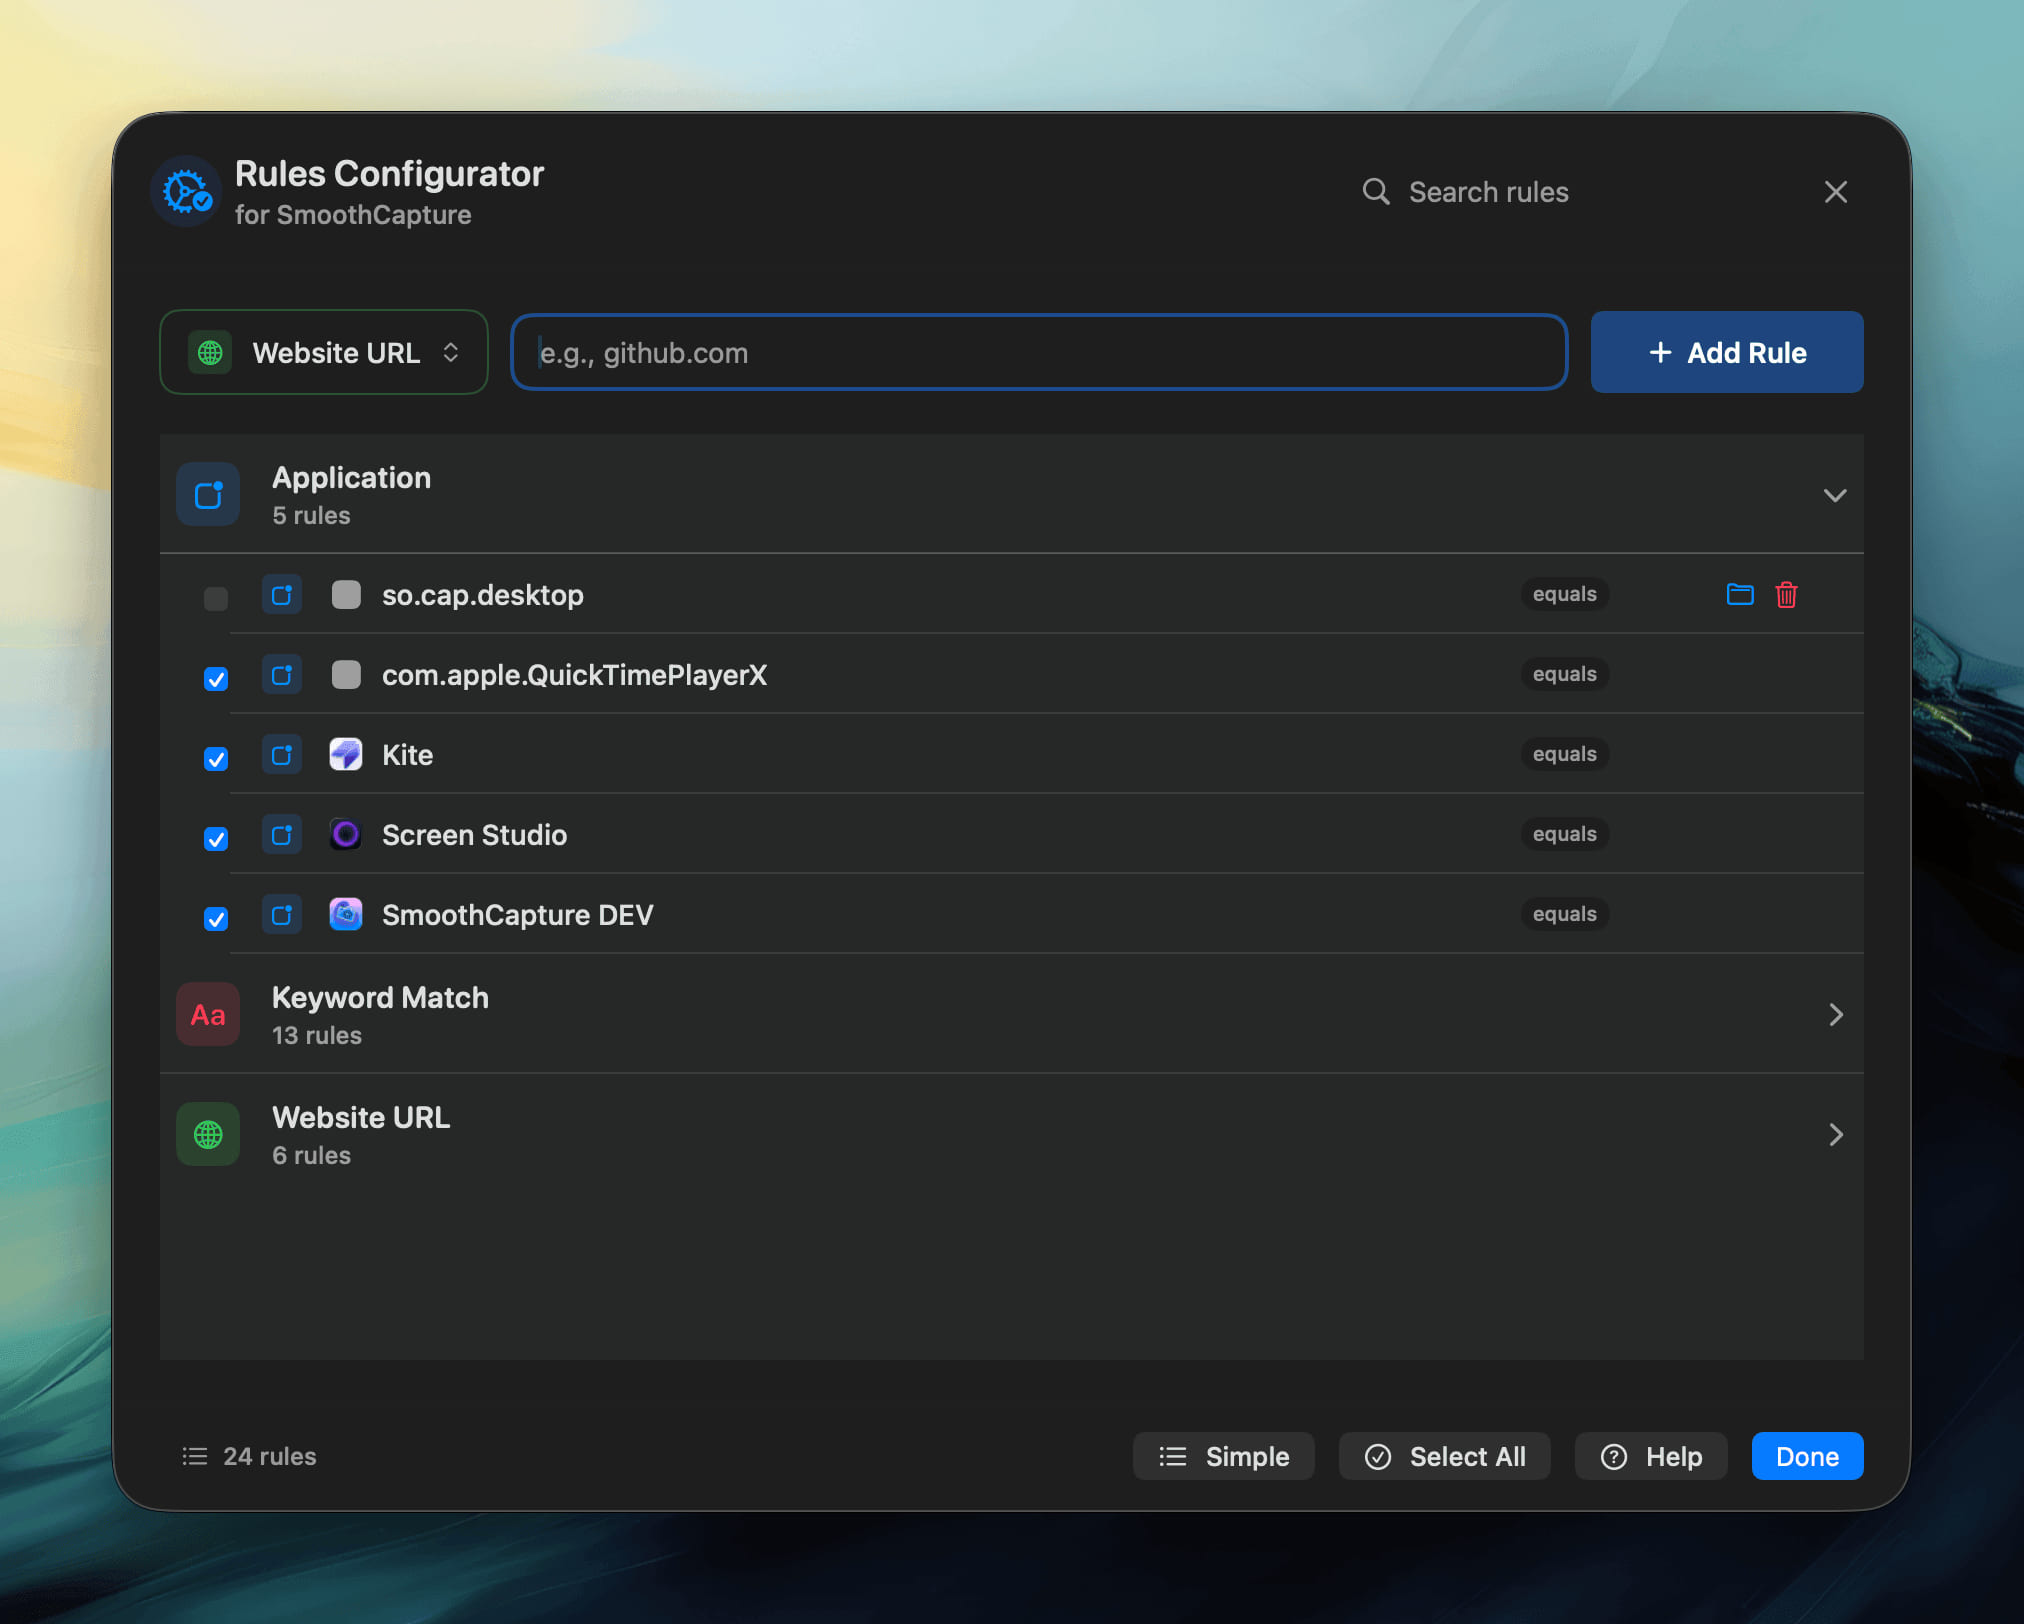
Open the Configurator
- Go to your Projects list in the sidebar.
- Double Click or Right-click a project → Manage Rules.
- The Rules Configurator window will appear, showing all matching conditions for that project.
Rule Types
Chronoid supports several rule types to detect and categorize activities:
- Application — Match based on app bundle ID or name.
- Keyword Match — Search window titles, domains, or file paths for specific keywords.
- Website URL — Automatically assign activities when browsing specific domains.
💡 Example: Add
github.comunder Website URL to auto-assign all GitHub activity to your “Development” project.
Add or Edit Rules
- Use the Add Rule button to create a new rule.
- Choose a rule type (Application, Keyword, or URL).
- Enter the matching condition and click Save.
- Double-click or right-click any existing rule to edit or delete it.
Manage Multiple Rules
- Select / Deselect: Quickly enable or disable individual rules.
- Select All: Toggle all rules on or off at once.
- Simple / Advanced View: Switch between compact and detailed rule display.
- Search Rules: Filter by keyword to locate specific entries faster.
Best Practices
- Keep your rules simple and focused — avoid overlapping keywords.
- Use Keyword Match for flexible conditions (e.g., “meeting”, “Figma”, “research”).
- Review your rules periodically to ensure auto-assignment stays accurate as your workflow changes.
Need help? Email support@chronoid.app