Chronoid now ships with a built-in MCP (Model Context Protocol) server and native Apple Intelligence support. These two features change how you interact with your time tracking data: MCP lets you query your activity history through any compatible AI assistant, while Apple Intelligence categorizes your work automatically using on-device AI.
This guide walks you through setting up both.
What Is MCP and Why Does It Matter?
The Model Context Protocol is an open standard that lets AI assistants connect to external data sources. Instead of copy-pasting reports or describing your day from memory, you can simply ask your AI assistant questions like:
- "What did I work on yesterday?"
- "How much time did I spend in Xcode this week?"
- "Show me my distraction patterns for the last month"
- "When were my most productive hours today?"
Chronoid's MCP server exposes 11 read-only tools that give AI assistants structured access to your time tracking data. Everything stays local on your Mac — the MCP server reads directly from Chronoid's local database.
Available Tools
| Tool | What It Does |
|---|---|
get_full_day_report |
Complete day summary with apps, websites, categories, and timeline |
get_daily_summary |
Lightweight summary with total time, active hours, and top apps |
get_app_usage |
Application usage statistics sorted by time |
get_detailed_activities |
Detailed activity spans with window titles and URLs |
analyze_work_sessions |
High-level work sessions with duration and efficiency |
analyze_productivity |
Productivity breakdown with productive vs. distracted time |
query_data |
Generic query for apps, categories, keywords, activities, domains |
analyze_interruptions |
Workflow interruption and context switching analysis |
analyze_distractions |
Distraction pattern analysis with triggers and timing |
get_range_rollup |
Weekly or monthly rollup with per-day breakdown |
get_focus_blocks |
Finds contiguous deep focus periods |
Setting Up the MCP Server
Chronoid bundles the MCP server binary inside the application. The path is:
/Applications/Chronoid.app/Contents/Resources/chronoid-mcp
No additional installation is needed — just add the configuration to your AI client.
Claude Desktop
Edit your Claude Desktop configuration file:
~/Library/Application Support/Claude/claude_desktop_config.json
Add the Chronoid server:
{
  "mcpServers": {
    "chronoid": {
      "command": "/Applications/Chronoid.app/Contents/Resources/chronoid-mcp",
      "args": []
    }
  }
}
Restart Claude Desktop to connect. You can verify it's working by asking Claude about your time tracking data.
For more details, see the Claude Desktop MCP documentation.
Cursor
Create or edit the MCP configuration file in your workspace or globally:
Per-workspace: .cursor/mcp.json in your project root
Global: ~/.cursor/mcp.json
{
  "mcpServers": {
    "chronoid": {
      "command": "/Applications/Chronoid.app/Contents/Resources/chronoid-mcp",
      "args": []
    }
  }
}
Restart Cursor to pick up the new server.
For more details, see the Cursor MCP documentation.
Windsurf
Edit the Windsurf MCP configuration file:
~/.codeium/windsurf/mcp_config.json
{
  "mcpServers": {
    "chronoid": {
      "command": "/Applications/Chronoid.app/Contents/Resources/chronoid-mcp",
      "args": []
    }
  }
}
Restart Windsurf to connect.
For more details, see the Windsurf MCP documentation.
VS Code (GitHub Copilot)
Create or edit the MCP configuration in your workspace:
Per-workspace: .vscode/mcp.json in your project root
{
  "mcp": {
    "servers": {
      "chronoid": {
        "type": "stdio",
        "command": "/Applications/Chronoid.app/Contents/Resources/chronoid-mcp",
        "args": []
      }
    }
  }
}
Or add it to your VS Code user settings (settings.json):
{
  "mcp": {
    "servers": {
      "chronoid": {
        "type": "stdio",
        "command": "/Applications/Chronoid.app/Contents/Resources/chronoid-mcp",
        "args": []
      }
    }
  }
}
For more details, see the VS Code MCP documentation.
Claude Code (CLI)
If you use Claude Code in the terminal, add Chronoid to your project-level or global configuration:
Project-level: Create .mcp.json in your project root:
{
  "mcpServers": {
    "chronoid": {
      "command": "/Applications/Chronoid.app/Contents/Resources/chronoid-mcp",
      "args": []
    }
  }
}
For more details, see the Claude Code MCP documentation.
Apple Intelligence
Chronoid now supports Apple Intelligence for automatic activity categorization. Instead of manually assigning categories to your time entries or configuring a third-party AI provider, you can use Apple's on-device foundation models to do it automatically.
Requirements
- macOS 26 (Tahoe) or later
- A Mac with Apple Silicon (M1 or later)
- Apple Intelligence enabled in System Settings
How to Enable
If you are updating to this version and have no AI providers configured, Chronoid will automatically enable Apple Intelligence for you. Otherwise, you can enable it manually:
- Open Chronoid Settings
- Go to AI Providers
- Find Apple Intelligence and toggle it on
- Go to AI Settings
- Set the suggestion provider to Apple Intelligence
- Enable AI Suggestions
Or use the quick toggle in the "What's New" dialog that appears after updating.
Privacy
Apple Intelligence runs entirely on your device. No data is sent to external servers, no API keys are needed, and your activity data never leaves your Mac. This makes it the most private option for AI-powered categorization.
Getting the Most Out of Both Features
MCP and Apple Intelligence work well together. Apple Intelligence handles the automated categorization in the background, keeping your time entries organized. MCP then lets you query that well-organized data through your AI assistant.
A typical workflow:
- Chronoid tracks your activity automatically
- Apple Intelligence categorizes entries as you work
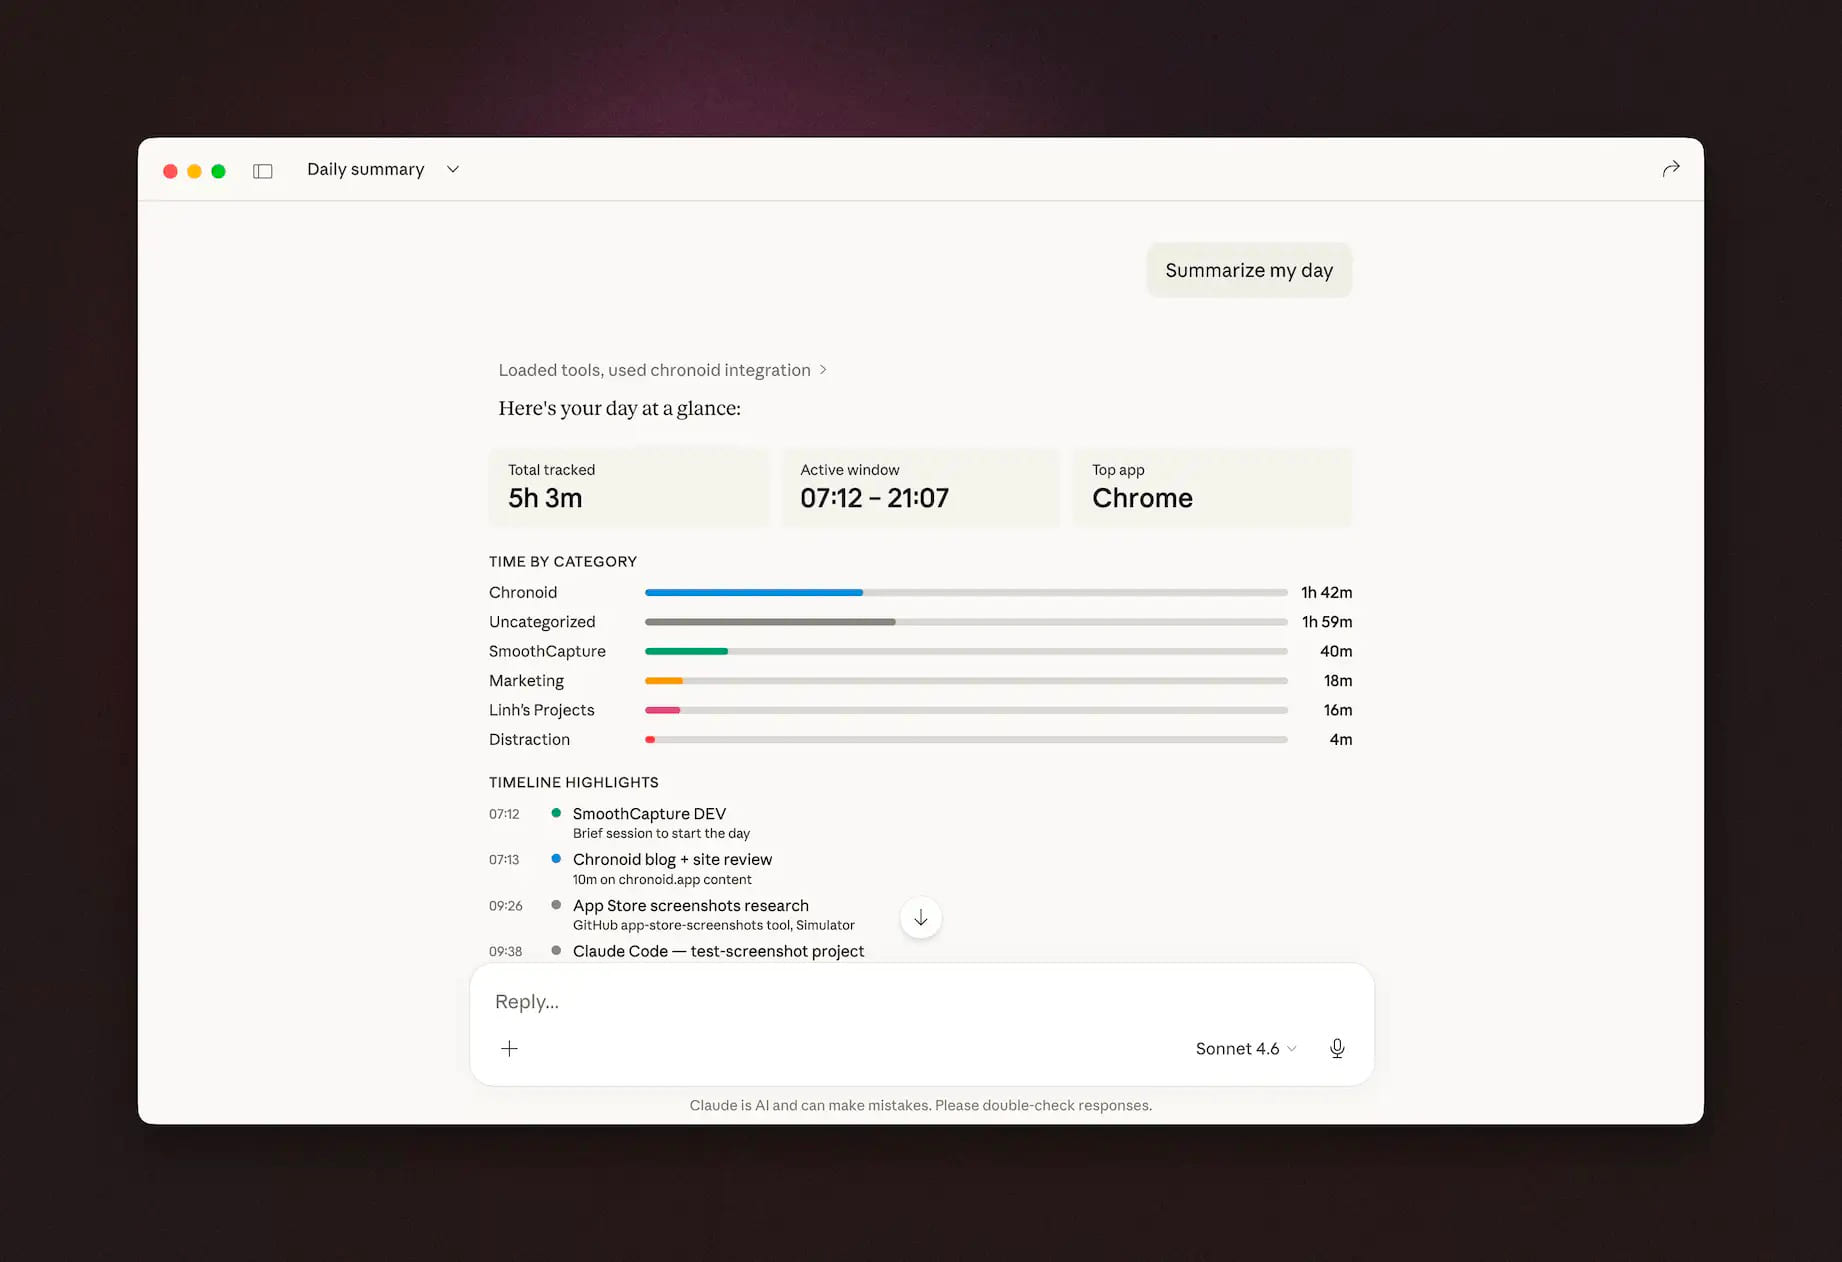
- At the end of the day, ask your AI assistant: "Summarize my work today" through MCP
- Get a structured breakdown of your productive time, distractions, and focus sessions
Both features require zero ongoing configuration once set up. They just work in the background, making your time tracking data more useful without adding friction to your workflow.
Have questions? Visit chronoid.app or reach out through the app's feedback option.